Blog and Tutorials
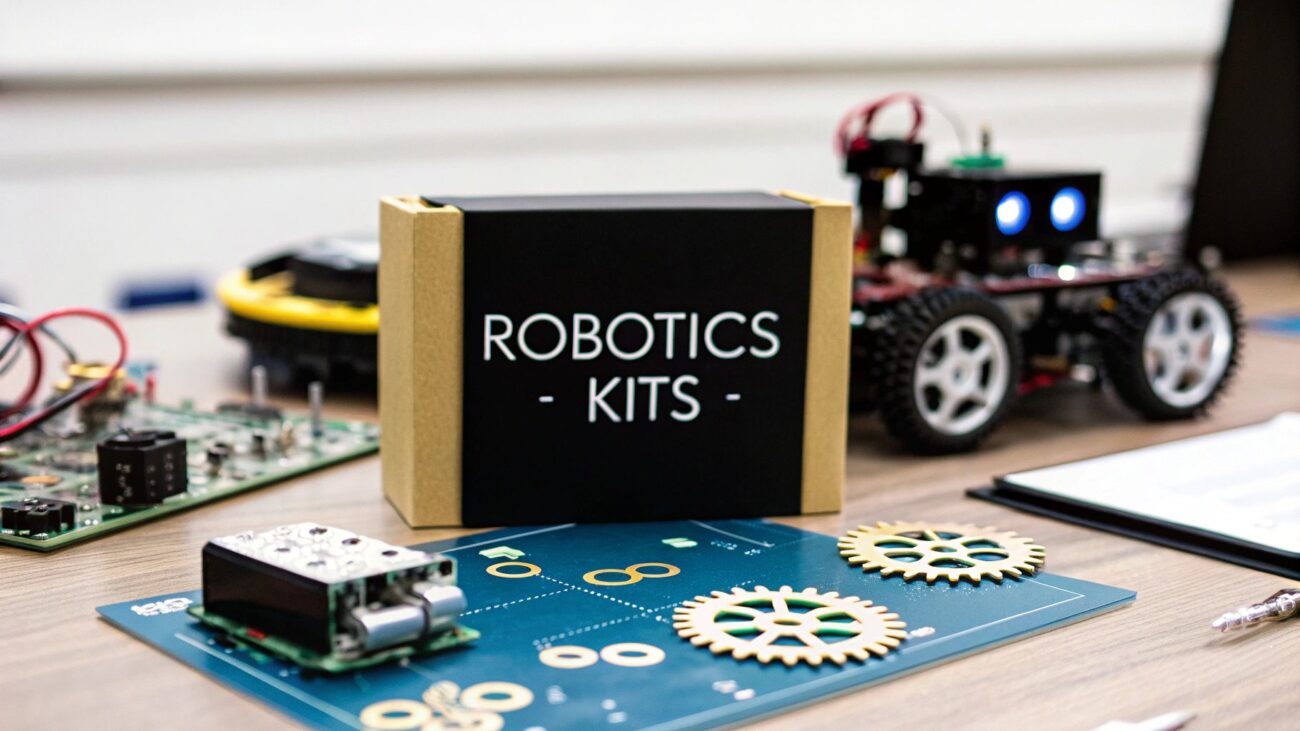
Essential Robotics Projects for Beginners

Robotics, once a futuristic concept, is now deeply woven into the fabric of modern life. Its influence spans diverse sectors, from manufacturing and medicine to space exploration and entertainment.
The age-old dream of bringing inanimate objects to life has propelled innovation for centuries, from the basic automatons of ancient Greece to the advanced, AI-driven robots we see today. This pursuit has spurred advancements in mechanical engineering, computer science, and artificial intelligence (AI).
What began as a purely mechanical endeavor, based on gears and levers, has evolved to encompass sophisticated programming, intricate sensor integration, and complex algorithms. This allows modern robots to execute increasingly complex tasks.
Effective robotics projects blend a strong theoretical foundation with practical, hands-on experience. They bridge the divide between abstract ideas and tangible creations, encouraging learning through direct involvement.
This active learning approach promotes a deeper understanding and motivates further exploration. So whether you’re grasping the physics of movement, the logic of programming, or the complexities of sensor integration, building a robot offers valuable insights into the core principles of robotics.
Table of Contents
8 Robotics Projects To Get You Started
Starting your journey in robotics can be quite intimidating, especially finding reliable resources and beginner-friendly projects. To overcome this, I have carefully selected these eight robotics projects that will take you on a journey, from basic movement to complex autonomous behavior.
These projects are designed for beginners, requiring no prior robotics experience. They utilize readily available components and platforms like Arduino, simplifying the process of getting started in 2025. Prepare to turn your enthusiasm for technology into tangible creations and launch your exciting robotics adventure.
1. Line Following Robot
The line following Robot is a classic entry point into robotics. It offers a tangible and engaging way to learn fundamental robotics concepts. This project involves building a small robot autonomously following a line, using sensors to detect the line and motors to steer itself. Its popularity comes from the balance it strikes between educational value and achievable complexity.
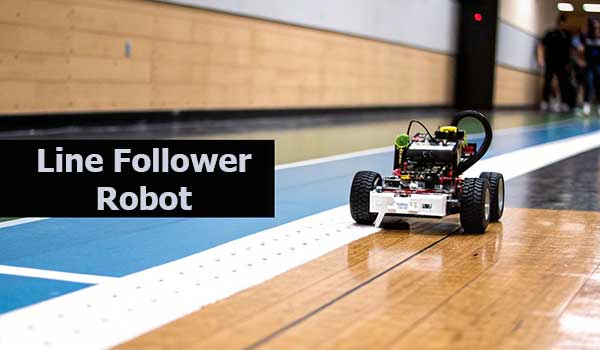
A line-following robot uses infrared (IR) or optical sensors to distinguish between the line and the surface. These sensors emit light and measure the reflected light intensity. A darker line reflects less light than a lighter surface, allowing the robot to detect the line’s edges. This data is then sent to a microcontroller, such as an Arduino, which acts as the robot’s brain.
The microcontroller processes the sensor readings and controls the motors. Motor drivers receive signals from the microcontroller and adjust the power to each wheel. This allows the robot to turn and stay on the line. A simple chassis, typically with four or two wheels and a caster wheel, forms the robot’s physical structure.
Features:
- IR or Optical Sensors: Detect the line by measuring reflected light.
- Microcontroller (e.g., Arduino): Processes sensor data and controls motors.
- Motor Drivers: Regulate power to the wheel motors.
- Chassis: Provides a platform for mounting components.
Pros:
- Low Cost: Components are readily available and affordable.
- Clear Success Criteria: The robot either follows the line, or it doesn’t. This makes progress assessment simple.
- Scalable Complexity: Start with basic line following and add features like speed control or obstacle avoidance.
- Fundamental Learning: Introduces core concepts like sensor integration and control loops.
Cons:
- Sensor Calibration: Precise sensor adjustment is sometimes needed for reliable line detection.
- Lighting Conditions: Ambient light can impact performance.
- Troubleshooting: Refinement often requires testing and adjustments.
Examples and Popularity:
Line-following robots are common in elementary school robotics competitions. This demonstrates their accessibility and educational value. Platforms like Makeblock’s mBot offer pre-built line following capabilities. The principles of line following are also used in industrial settings.
Automated Guided Vehicles (AGVs) use similar technology for navigation in warehouses and factories. Open-source platforms like Arduino, combined with community support from organizations like Adafruit and SparkFun, increase the project’s popularity.
Tips for Implementation:
- High Contrast Line: Start with a thick black line on a white surface.
- Simple Lines First: Begin with straight lines and gradually add curves.
- PID Control: Consider implementing a PID controller for smoother line following.
- Consistent Lighting: Test your robot in controlled lighting initially.
This project is a perfect blend of learning and fun. It provides a hands-on introduction to robotics without being overly complex or expensive. The clear success criteria and customization options make it a rewarding experience for beginners of all ages.
2. Obstacle Avoiding Robot
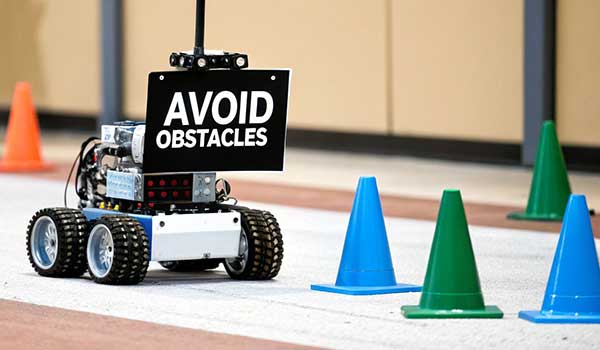
The obstacle-avoiding robot is a fundamental project for aspiring roboticists. It combines simplicity with valuable learning experiences, introducing the core concept of autonomous navigation. This project helps you understand how robots perceive and react to their surroundings, laying the groundwork for more complex robotic systems.
An obstacle-avoiding robot uses distance sensors, such as ultrasonic or infrared (IR) sensors, to detect objects. These sensors measure the distance to obstacles and send this data to a microcontroller. The microcontroller, acting as the robot’s “brain,” processes the information and determines how to react. A simple algorithm guides the robot’s movements, typically using a differential drive system with two independently controlled wheels.
This technology has numerous practical applications. From the iRobot Roomba navigating our homes to sophisticated security robots, obstacle avoidance is essential. Even self-driving cars utilize similar principles on a larger scale.
Features and Benefits
Autonomous Decision Making: This project provides practical experience in how robots make decisions based on sensor data, a basic form of artificial intelligence
Visible Feedback: The direct link between your programming and the robot’s actions offers immediate feedback, making the learning process engaging.
Adaptability: Obstacle avoidance principles apply to diverse environments, encouraging creative problem-solving.
- Foundation for Advanced Robotics: The skills gained, such as sensor integration, control algorithms, and autonomous navigation, are essential for more complex projects.
Pros and Cons
Here’s a quick breakdown of the advantages and disadvantages of building this project as a beginner:
| Pros | Cons |
|---|---|
| Provides visible feedback on programming | Sensor limitations can lead to unpredictable actions |
| Provides visible feedback of programming | More complex programming than basic robots |
| Adaptable to various environments | Algorithms may require adjustments for different environments |
| Introduces advanced robotics concepts |
Tips for Implementation
Start Simple: Begin with a clear environment and few obstacles to test and refine your code gradually.
Random Walk Algorithm: Implement a basic “random walk” algorithm where the robot moves forward until detecting an obstacle, then randomly chooses a new direction. This serves as a good starting point.
Sensor Placement: Position sensors slightly above the wheels for early obstacle detection.
Introduce Delays: Add small delays after avoidance maneuvers for course correction.
The availability of affordable microcontrollers like Arduino and Raspberry Pi, along with active online communities and DIY robotics YouTubers, has popularized this project. Educational robotics companies like Makeblock and platforms like the Elegoo Smart Robot Car offer accessible kits, making obstacle avoidance robots a popular choice for education and hobbyists.
3. Robotic Arm With Servo Motors
Building a robotic arm with servo motors is a great way to get started in robotics. It offers a hands-on learning experience, perfect for beginners. This project lets you explore core robotics concepts like kinematics, precision control, and mechanical design. You’ll control multiple joints using servo motors, allowing the arm to manipulate objects much like industrial robotic arms.
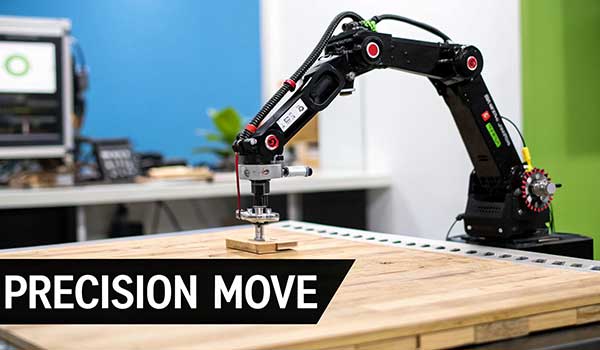
As seen above, a typical robotic arm project involves a base, arm segments joined together, an end effector (like a gripper), and a microcontroller to control the servo movements. This setup provides several degrees of freedom, allowing the arm to reach various points and orient the gripper. You might find helpful components and tools at the DIYgh store.
This project earns its spot on this list because it provides a visual, interactive learning experience. The mechanical operation is clear, and programming the movements offers instant feedback. Plus, it introduces essential concepts used in industrial robotics, like forward and inverse kinematics – the mathematics behind controlling arm movement.
Features and Benefits
- Multiple degrees of freedom: Servos at each joint provide flexible movement.
- Gripper mechanism: Enables the arm to grab and move objects.
- Microcontroller control: Offers precise, programmable movement.
- Visible mechanical design: Makes it easier to understand how parts interact.
- Teaches kinematics: Offers practical kinematics application.
- Scalable complexity: Begin with a simple 2-joint arm and expand to more complex designs.
- Programmable for repeatable tasks: Automate specific motions and actions.
Pros and Cons
Here’s a quick breakdown of the advantages and disadvantages of building robotic arm as a beginner:
| Pros | Cons |
|---|---|
| Demonstrates real-world robotics principles | More complex assembly than other robotics projects |
| Visible mechanical design | Requires precise 3D printing or crafting |
| Programmable for repeatable tasks | Limited lifting capacity with budget-friendly servo motors |
| Teaches forward and inverse kinematics concepts | Power needs increase with more servos |
Examples and Tips
Some popular examples of robotic arms include the MeArm (an open-source kit), the SainSmart 6-axis desktop robotic arm, and the Dobot Magician (an educational robotic arm).
Here are some tips for your project:
- Start small with a 2-3 servo design.
- Use servo libraries to simplify coding.
- Consider weight distribution when designing.
- Program gradual movements for smoother operation.
- Use a dedicated power supply for the servos.
4. Bluetooth/Remote Controlled Robot
Building a Bluetooth/Remote Controlled Robot is an excellent entry point into robotics. This project blends hardware and software development, allowing beginners to grasp fundamental concepts while creating something tangible and fun.
The core concept involves wirelessly controlling a mobile robot using Bluetooth, WiFi, or RF. This hands-on experience provides valuable insights into wireless communication, remote control systems, and mobile robotics.
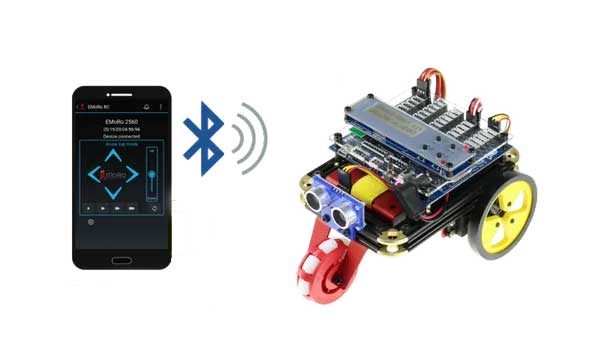
A remote-controlled robot comprises a few key components: a wireless communication module (Bluetooth HC-05/HC-06, ESP8266 for WiFi, or an RF module), a motor control system, and a mobile phone or custom-built controller.
Features and Benefits
- Wireless Control: Maneuver the robot remotely, creating an interactive and engaging experience.
- Learning Wireless Communication: Gain practical experience with various wireless protocols and understand their limitations.
- Expandable Platform: Easily add features like cameras, sensors (ultrasonic, infrared), or robotic arms for expanded functionality.
- Custom Control App Development: Create personalized control interfaces using platforms like MIT App Inventor or dedicated coding.
Pros and Cons
Pros:
- Engaging and Fun: The immediate gratification of wireless control makes learning enjoyable.
- Introduction to Wireless Protocols: Provides a practical understanding of Bluetooth, WiFi, or RF communication.
- Expandability: The platform is easily customized and expanded for increasingly complex projects.
- Custom App Development: Learn app development and tailor the control interface to your specific needs.
Cons:
- Limited Range: The operating range is limited by the communication method.
- Controller Development: Building a custom controller can be challenging for beginners.
- Battery Life: Wireless communication can drain the battery quickly.
- Connection Stability: Wireless connections can be susceptible to interference.
Examples and Tips
Examples:
- Elegoo Smart Robot Car Kit: A popular beginner kit with all the necessary components.
- SunFounder Smart Video Car for Raspberry Pi: Offers advanced features like video streaming and Raspberry Pi integration.
- DIY Arduino Bluetooth RC Cars: Numerous online tutorials guide you through building a custom RC car using Arduino and Bluetooth modules.
Tips for Implementation:
- Separate Power Supplies: Use separate batteries for motors and control electronics for smooth operation.
- Start with Pre-built Apps: Use a pre-built app before developing a custom app.
- Implement Speed Control: Incorporate speed control instead of just on/off motor control.
- Status LEDs: Use LEDs for connection status and feedback.
- Consider Latency: Account for communication delays when designing control systems.
Popularity and Significance
The growth of the Arduino and Raspberry Pi communities has fueled the popularity of these projects. Platforms like MIT App Inventor have democratized app development. Educational kits from companies like Elegoo and SunFounder have also played a crucial role.
This project offers a fantastic learning experience while being immensely enjoyable. It’s a gateway to advanced robotics, empowering beginners to create something interactive, sparking further interest in the field.
5. Drawing Robot (Arduino CNC)
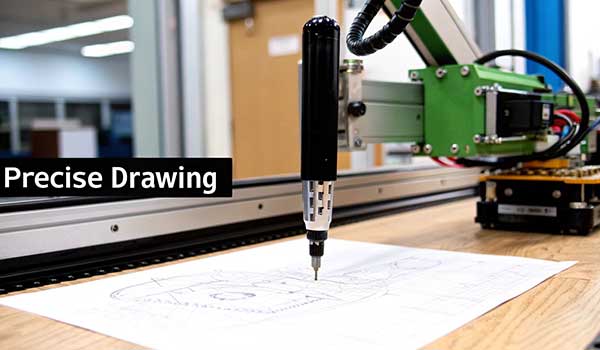
A Drawing Robot, also known as a CNC plotter, bridges the gap between digital art and the physical world. It takes digital designs and transforms them into physical drawings using a pen. This provides a tangible result for your programming efforts. The project is a great way to learn core robotics concepts like computer-controlled motion, coordinate systems, and G-code interpretation, all while producing visually appealing artwork.
This project is noteworthy because it blends creativity with technical learning. Unlike projects focused solely on mechanics or code, the drawing robot combines both. The result is a physical piece of art, making the project engaging and motivating, especially for beginners.
How It Works
The drawing robot uses a two- or three-axis system driven by stepper motors for precise pen positioning. A pen lift mechanism, usually controlled by a servo motor, allows the robot to raise and lower the pen to create distinct lines and shapes.
An Arduino controller board interprets commands, often in G-code (a standard language for CNC machines), and directs the motors. The drawing is created on a flat surface within the robot’s frame.
Features and Benefits
- Produces Physical Artwork: Seeing your code’s output as a drawing makes the learning process more engaging.
- Precise Motion Control: Using stepper motors and G-code introduces the principles of precise motion control, crucial for robotics.
- CAD-to-Physical Concepts: This project helps you understand how digital designs become physical objects, a key concept in manufacturing and prototyping.
- Scalability: A simple drawing robot can lead to more complex CNC projects like milling and laser engraving.
Pros and Cons
Pros:
- Creates physical artwork
- Teaches precise motion control
- Introduces CAD-to-physical concepts
- Potential for more complex CNC projects
Cons:
- Requires precise calibration
- May need special software for G-code
- Mechanical assembly can be difficult
- Larger drawings require sturdy construction
Examples and Popularity
Commercial plotters like the AxiDraw from Evil Mad Scientist have made desktop pen plotting popular. Open-source GRBL CNC control software and readily available Arduino boards make this technology accessible. Online communities like Thingiverse and Instructables offer many DIY plotter designs and tutorials. Makeblock also sells XY Plotter Robot Kits for a more structured approach.
Tips for Implementation
- Start Simple: Begin with basic shapes and progress to more complex drawings.
- Pen Choice: Technical pens with fine tips (0.3-0.5mm) work best.
- Flat Surface: A perfectly flat drawing surface prevents errors and inconsistencies.
- Calibration is Key: Calibrating steps-per-mm is crucial for precision.
- Software: Inkscape with extensions can generate G-code from vector graphics.
Evolution and Impact
Drawing robots, once expensive and specialized, are now accessible DIY projects. This is thanks to open-source software, affordable hardware, and a thriving maker community.
These machines allow individuals to explore the combination of art and technology, encouraging creativity and technical skills. They are a valuable educational tool for students and hobbyists, opening up robotics and digital fabrication.
6. Autonomous Maze Solver Robot
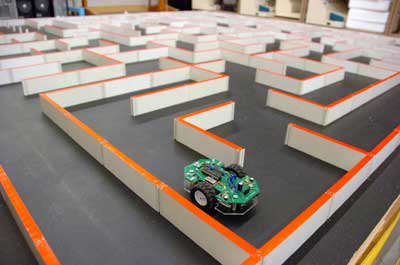
An autonomous maze solver robot presents a fascinating challenge in robotics, blending hardware and software design. The project involves creating a robot that can navigate a maze without human guidance, using sensors and algorithms to understand its environment, make decisions, and plot a course.
This teaches valuable skills like pathfinding, mapping, and decision-making, offering a practical and rewarding experience for those looking to expand their robotics knowledge. It perfectly demonstrates how seemingly simple tasks can require intricate programming and engineering.
This project relies on several key components: distance sensors (such as ultrasonic or infrared) to detect walls, wheel encoders to monitor movement and measure distance, a memory system (often on a microcontroller) to store the robot’s map of the maze, and a differential drive system with two independently controlled motors for precise maneuvering.
The core of the project lies in the implementation of pathfinding algorithms, from basic wall-following techniques to more complex algorithms like flood fill or A*. The objective is simple: navigate from the maze’s entrance to its exit.
The autonomous maze solver earns its place on this list because it bridges basic robotics with more advanced autonomous systems. It provides a practical application of algorithmic concepts and allows for gradual improvement. You might begin with a simple wall-following algorithm and progress to more sophisticated strategies.
This iterative process promotes continuous learning and refinement. Follow this YouTube video for a step-by-step guide to building the autonomous maze solver.
Advantages of an Autonomous Maze Solver
- Combines hardware and algorithm challenges, providing a well-rounded learning opportunity.
- Offers clear success criteria: the robot either solves the maze or it doesn’t.
- Teaches fundamental principles used in autonomous vehicles and robots in real-world applications.
- Allows for continuous improvement through better algorithms and sensor integration.
Challenges of an Autonomous Maze Solver
- Requires more complex programming than basic robotics projects.
- Demands an understanding of pathfinding algorithms.
- Needs accurate sensor readings and precise motor control.
- Requires building or acquiring a maze for testing.
Examples of autonomous maze solvers range from the competitive Micromouse robots to educational platforms like the Pololu 3pi robot, and countless DIY Arduino-based maze solvers found on sites like Instructables.
The Micromouse competitions, a global event since the 1970s, have fueled the project’s popularity and evolution, inspiring countless students, hobbyists, and professionals. University robotics programs and IEEE robotics chapters often feature maze-solving competitions as well.
Tips for Building Your Own
- Start simple with a right-hand (or left-hand) wall-following algorithm.
- Begin with a simple maze and gradually increase complexity.
- Use LEDs or other visual cues to help visualize the robot’s decisions.
- Maintain consistent motor speeds for reliable navigation.
- Consider using odometry techniques for improved position tracking.
7. Arduino Weather Station Robot
An Arduino Weather Station Robot combines robotics and environmental science, creating an engaging project suitable for beginners and a useful tool for collecting data. This project involves building an automated system that collects, processes and presents real-world weather information. It provides practical experience in sensor integration, data logging, and the application of robotics in environmental monitoring.
This project stands out due to its ability to connect theoretical knowledge with practical application. It goes beyond simply constructing a robot; it’s about learning how technology can interact with and gather insights from our environment.
Features and Benefits
A standard Arduino Weather Station Robot typically includes these key features:
Multiple Environmental Sensors: These sensors measure various environmental factors like temperature, humidity, barometric pressure, rainfall, wind speed and direction, UV index, and more. This allows for a comprehensive understanding of local weather conditions.
Data Logging: The Arduino stores the gathered sensor data, which allows you to track changes over time and observe trends.
Display/Reporting: The data can be shown on an LCD screen connected to the Arduino. It can also be sent wirelessly (e.g., via WiFi or Bluetooth) to a computer or smartphone for remote access.
Optional Mobility: For more experienced users, the weather station can be mounted on a mobile platform, enabling data collection from different areas.
Renewable Energy: Adding a solar panel provides a sustainable power source for extended deployments, especially in remote locations.
Pros and Cons
Here’s a breakdown of the advantages and disadvantages for building this project as a beginner:
| Pros | Cons |
|---|---|
| Real-world Data Generation | Cost of Weather Sensors |
| Interdisciplinary Learning | Sensor Calibration Requirements |
| Expandability with Additional Features | Weatherproofing Needs |
| Hands-on Data Analysis Experience | Power Management Considerations |
Examples and Resources
Several resources are available to help you get started:
SparkFun Weather Station Kits: These kits offer a convenient starting point with pre-selected components and detailed instructions. Check out SparkFun
Arduino-based weather stations with ThingSpeak Integration: ThingSpeak is an IoT analytics platform that lets you store and visualize weather data online.
DIY stations on Instructables and Hackster.io: Numerous community projects on Instructables and Hackster.io provide diverse designs and customization ideas.
Tips for Implementation
Consider these tips when building your weather station:
Weatherproofing: Protect the electronics with a waterproof enclosure for outdoor use.
Sensor Placement: Place temperature sensors away from direct sunlight to ensure accurate readings.
Power Management: Use sleep modes to extend battery life for long-term operation.
Data Sharing: Share your data with a wider audience through platforms like Weather Underground.
Web Interface: Develop a web interface for remote data access and visualization.
Popularity and Evolution
The Arduino Weather Station Robot has become popular thanks to environmental organizations, citizen science projects like the Weather Underground PWS network, and educational platforms like Arduino Education.
The increasing availability of affordable sensors, the growth of the maker movement, and a rising interest in environmental monitoring have fueled its widespread adoption. These projects initially focused on data logging and display.
However, advancements in wireless communication and cloud computing have expanded their capabilities to include remote monitoring, data sharing, and integration with larger environmental networks.
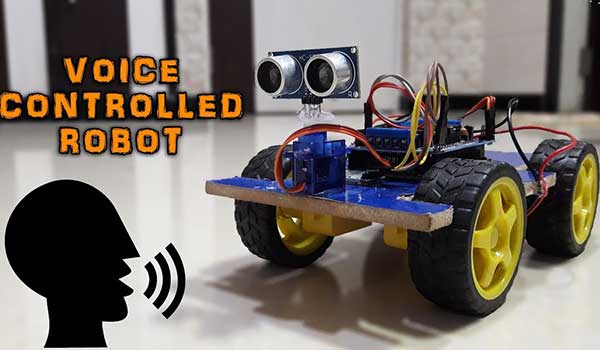
8. Voice-Controlled Robot
Building a voice-controlled robot is an interesting project that connects human language with machine action. It moves beyond basic robotics into speech recognition and human-machine interaction. By programming a robot to respond to verbal commands, you create an interactive system that can move, turn, or activate features using only your voice.
The core of a voice-controlled robot is its ability to understand human speech. This involves a speech recognition module or a cloud-based speech-to-text service like Google Cloud Speech-to-Text. The system processes these commands to trigger actions in the robot.
Feedback, like LEDs, sounds, or a display, confirms command execution, creating a seamless interactive experience. Wireless connectivity and a mobile platform with various functions (motors, sensors, actuators) are essential for a dynamic voice-controlled robot.
This project offers several benefits. It provides a practical introduction to Natural Language Processing (NLP) and human-machine interaction. You can continuously add commands and functions, creating a continuous learning process. Start with simple movements like “forward,” “backward,” “left,” and “right,” then add complex actions like “pick up object” or “follow me.”
There are some challenges to consider. Speech recognition accuracy can be affected by background noise. The programming is more complex than basic robotic control, requiring command parsing. Some speech recognition solutions need internet access, which can cause latency and privacy issues.
Language variations can also affect accuracy. You might find additional helpful information in Our DIY Guides Sitemap for further robotics explorations.
Tools and Technologies for Voice Control
Several tools simplify creation of voice-controlled robots. Amazon Echo technology offers a sophisticated speech recognition engine adaptable for robotics. The Google AIY Voice Kit provides an accessible way to integrate voice interaction with robotics platforms.
Arduino platforms combined with EasyVR or similar voice recognition modules offer a customizable solution. These technologies, popularized by Amazon Alexa and Google Assistant and explored by groups like MIT’s Affective Computing group, make voice control in robotics accessible.
Tips for Success
Fllow these tips to improve your chances of building a voice controlled robot as a beginner:
- Start with a small command set (5-10 commands).
- Train the system in the robot’s operating environment.
- Include visual or audio command confirmation.
- Consider offline speech recognition.
- Implement error handling for misheard commands.
This project is an excellent starting point for beginners. It’s a rewarding way to learn advanced robotics concepts practically. While challenging, the interactive robot demonstrates the power of robotics combined with speech recognition, preparing you for more complex projects.
8-Project Beginner Robotics Comparison
| Project Title | Complexity 🔄 | Resources ⚡ | Outcomes 📊 | Use Cases 💡 | Advantages ⭐ |
|---|---|---|---|---|---|
| Line Following Robot | Low-Medium; requires sensor calibration and iterative tuning | Minimal components like Arduino, IR sensors, and simple chassis | Fundamental sensor integration and motor control lessons | Educational projects and robotics competitions | Low cost, scalable design, clear success criteria |
| Obstacle Avoiding Robot | Medium; involves decision-making algorithms and sensor fusion | Moderate; ultrasonic/IR sensors, motor drivers, and microcontroller | Autonomous navigation and real-time obstacle avoidance insights | Experimentation in autonomous robotics | Introduces environmental awareness and adaptive behavior |
| Robotic Arm with Servo Motors | Medium-High; requires precise mechanical assembly and control | Multiple servo motors, microcontroller, and crafted arm segments | Demonstrates kinematics and repeatable task automation | Industrial simulation and educational labs | Visible mechanical design and programming flexibility |
| Bluetooth/Remote Controlled Robot | Low-Medium; adds wireless communication challenges | Moderate; Bluetooth/WiFi modules, motor drivers, and chassis kit | Real-time remote control and interactive system operation | Hobby projects and interactive robot control | Highly engaging with expandable communication options |
| Drawing Robot (Arduino CNC) | High; demands precise calibration and coordinated motion control | High; stepper motors, CNC shield, laser-cut/3D printed parts and linear mechanisms | Translates digital designs into physical artwork | Art and CNC learning environments | Produces tangible art and teaches precision motion control |
| Autonomous Maze Solver Robot | High; complex algorithms and mapping require precise sensor input | High; multiple distance sensors, encoders, motor drivers, and dedicated chassis | Autonomous maze solving with pathfinding insights | Maze competitions and algorithm testing | Combines hardware challenges with advanced problem solving |
| Arduino Weather Station Robot | Medium; involves integrating multiple sensors and data logging | Moderate-High; environmental sensors, display modules, and power components | Continuous collection and reporting of real-world weather data | Environmental monitoring and citizen science | Practical data output with room for sensor expansion |
| Voice-Controlled Robot | High; requires advanced speech recognition and command parsing | High; voice modules, possibly a Raspberry Pi or advanced Arduino, plus feedback systems | Interactive operation based on natural language commands | Human-machine interaction research and interactive projects | Engaging interface with introduction to NLP integration |
Next Steps in Your Robotics Adventure
These eight robotics projects provide a solid foundation in robotics fundamentals. From basic movement with line-following and obstacle-avoiding robots to more complex tasks like drawing with the Arduino CNC and autonomously navigating mazes, you’ve explored a range of core concepts.
You’ve gained experience with sensor integration, motor control, basic programming logic, and the importance of iterative design – tweaking and improving your project through testing and experimentation.
Now you’re ready to apply these principles to more intricate projects. Consider combining concepts – perhaps merging the maze-solving capabilities with obstacle avoidance, or adding Bluetooth control to the robotic arm.
As you advance, engage in more advanced topics like artificial intelligence, computer vision, and more sophisticated robotic systems. Think about how you can integrate sensors to collect data and react to the environment in more nuanced ways.
Learning in robotics is a continuous journey. Embrace challenges, don’t hesitate to experiment, and learn from both your successes and failures. The field of robotics is constantly evolving, so staying current with emerging trends is essential.
Explore specialized areas like swarm robotics, soft robotics, and the connections between robotics and other disciplines like biotechnology and nanotechnology. The possibilities are boundless!
Expanding Your Robotics Knowledge
- Master the Fundamentals: A solid grasp of core concepts is essential for tackling more complex robotics projects.
- Embrace Iterative Design: Experimentation and refinement are key to successful robotics projects. Don’t be afraid to adjust your designs based on testing results.
- Commit to Continuous Learning: The robotics field is constantly evolving. Stay curious and keep exploring new advancements and technologies.
- Explore Integration: Combining learned concepts and technologies often leads to more innovative and complex robotic systems.
Ready to elevate your robotics skills? Equip yourself with the resources you need to succeed. DIYgh Tech Hub provides a comprehensive platform for all your robotics requirements, offering high-quality, affordable kits, components, and expert tutorials to support your learning and exploration.
From Arduino boards and sensor modules to a wide selection of electronics accessories, DIYgh Tech Hub has what you need to bring your innovative robotics ideas to life. Visit DIYgh Tech Hub today and unlock your robotics potential!